“Even if I knew that tomorrow the world would go to pieces, I would still plant my apple tree.”
Martin Luther
Sometimes I wonder if I love stone fruit more or apples. After hanging on to the last of summer fruit so desperately, I think I was childish. Apples are a whole new passion and hold so much versatility. Munch them or bake them, never ending possibilities… one such delightful possibility being these homey, comforting Mini Apple Upside-down Cakes with Salted Butter Caramel … #applelove!I absolutely love the goodness of simple bakes. For me, individual portions hold eternal charm, so when I saw these delicious bites at Jamies place one day, I knew I would be baking them really soon. As I crept into Lifes A Feast while she was in sleeping {day here, night in Nantes}, I knew these little apple cakes were going to be good.
I also knew that the salted butter caramel sauce would be the most delicious sauce I had ever made! Mmmm … while the cakes baked, the addictive sauce cooled. Spoonfuls did the disappearing act as usual, the hungry little dwarves at work in the kitchen!These cakes are convenient to make. Great for a fast track fall/winter dessert, individual portions that warm the cockles of your heart, slathered in a buttery caramel sauce . C’est bon … caramel, butterscotch, butter, sweet, salty – all goodness in my little white jug, delicious thoughts happily playing in my head! It’s a good sauce to have in your recipe folder. Très savoureux!! These are tasty little cakes to make you happy this holiday season. Make a double helping of the salted butter caramel if you like as it stores well refrigerated. Reheat it in the microwave for 15-20 seconds and you’re good to go! I added a bit while whipping up my low fat cream for this Perfect Pumpkin Pie; I dare say that cream would make a delicious frosting for a cake!
[amd-zlrecipe-recipe:22]
Happy Thanksgiving to all of you!
Talking about the holiday season, here are a few things I’d like to share with you …
Play Visa Signature’s ‘Go Weekends‘ Instant Win Game for a Chance at $300 worth of prizes. For your chance to win, visit the Visa Signature Facebook Page and click on the Go Weekends tab. Drag and drop the activities you’d like to do this weekend and submit your plans to see if you are an instant winner. You can play once every day until November 18th. No purchase necessary. Prizes could include $100 to Restaurants.com, Omaha Steaks, and even Sur la Table.
For my local readers in India … Timesdeals have an an amazing deal in partnership with Barista Lavazza – ‘Buy any beverage and Get another one absolutely Free @ Barista Lavazza’. This deal is available Pan India.
“Surely the apple is the noblest of fruits.”
Henry David Thoreau
Cinnamon, apples, walnuts, brown sugar…these are a few of my favourite fall ingredients. Put them in together to make a Classic Spiced Apple Walnut Buttermilk Coffee Cake and you will rock October! This is just what Abby Dodge guaranteed when she put out the#baketogether recipe for October … a Classic Spiced Coffee Cake with ‘your twist‘ to the recipe.
She says, “I selected Classic Sour Cream Coffeecake for this months’ #baketogether because it is, well, a classic – one that should be in every recipe box even if yours in stashed on your computer. The flavors are traditional: cinnamon, nutmeg (I like mine freshly grated), butter, brown sugar and sour cream. The method is straight-forward and the batter can even be made with a hand-held mixer (just like my Mom used). It’s these qualities that make it such a great #baketogether recipe. This base recipe is perfect as is YET there’s literally hundreds of ways for everyone to switch things up. It’s the perfect vanilla canvas that’s just waiting for some twisting and shaking.”Coffee cakes are usually single layer cakes that may be square or rectangular like a Stollen or loaf-shaped rectangular cakes, and are are typically flavored with cinnamon, seeds, nuts, and fruits. These cakes sometimes have a crumbly or crumb topping called streusel and/or a light glaze drizzle.
I love it when I have a classic basic recipe that I can play around with, which is why I like to #baketogether each month despite the obvious lack of time I feel.Moist, delicious, packed with flavour, light, FALL, fruity … these were the thoughts that buzzed through my head as I tasted the first bite. Even though the cake is said to taste better on day 2, it tasted fab on day 1. No cake can sit there in it’s ‘whole’ shape in our home; justice has to be done to it asap!The first bite into the lads mouth…and he said, “Mmmmmm, tastes just like pumpkin pie Mama!” It’s amusing to see how he connects to food. He loved that Praline Pumpkin Pie I made exactly two years ago. Anything with similar flavours takes him back to that gorgeous pie I baked from Park Avenue Potluck CELEBRATIONS for a virtual dinner party for the ‘fight against cancer‘ with the The Society of Memorial Sloan-Kettering Cancer Center.The house filled with fall aromas as the cake baked, warm cinnamon aromas wafting through lazily, a good morning that day where there were thankfully no power cuts. I substituted the sour cream in Abby recipe with half home made yogurt and half buttermilk as we don’t get sour cream locally here. The substitiution worked a charm resulting in a fabulous moist texture.Before I get to the recipe, I’d like to thank the very talented and wonderful Jennifer Bartoli {who also blogs at Chocolate Shavings} for interviewing me for an article in the National Post, Toronto, that was published today. ‘Gear up for gastronomic greatness‘ makes for an interesting read. Its about me and 2 other very talented food bloggers and our favourite kitchen tools and appliances.
“Almost all words do have color and nothing is more pleasant than to utter a pink word and see someone’s eyes light up and know it is a pink word for him or her too”
Gladys Taber
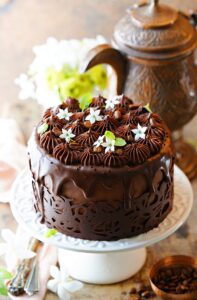
This ones going to be a short post. Its the PINK time of the year and even if I wanted to, I couldn’t shrug Mr PABs pink birthday cake off my shoulders. The dieting diva with all her charm, asked sweetly, ” Is ‘it‘ going to be PINK again!”. I love how well the kids grasp things that are important, so we had a fast track Chocolate & Strawberry Cream Cake this year!
The pink ribbon is an internationally recognized symbol of hope and awareness in the fight against breast cancer
Life has been a race against time and I had thoughts of barely throwing together a cake for Mr Man, PINK beginning to look pretty elusive. But the PINKPlum Fro Yo post had a couple of readers connect with me over the past few years, and I was pleasantly surprised to hear them ask about a PINK cake for Mr PAB… guess the pressure was on! Dive into the freezer and it was back to simmering strawberries and balsamic vinegar in brown sugar like Speedy Gonsalez. Gosh! Why did October get here so fast, and why did his birthday have to be at the very beginning? Sigh….In the midst of this, Jamie and I discussed Octobers theme for MacTweets and we both voted for PINK there too. I was really ambitious…really! No aged whites, a new recipe and lack of time is obviously a recipe for disaster. Ambitious me also piped pink mac ribbons! Needless to say the feet speedily failed me. I used a meringue/macaron ribbon to top my cake. A dusting of sugar hid its failings, yet added to the PINK!
Do you want to join us making MACARONS?
If you do, you are most welcome to join us. You can find all the information at our dedicated macaron blog MacTweets. We generally post the round-up by the end of every month, following which a new challenge is posted!
Here we go … my strawberry and chocolate cake for Pinktober since the teen insisted on chocolate. Before I get to the recipe I have to tell you that she decided to bake some cupcakes for her Dad all by herself {that DOES NOT include kitchen clearing and cleaning services}, and she set to work at the same time I was trying to layer the cake. I could have wept, but was VERY brave and soldiered on!The teen made pretty cupcakes {from my blog here} and declared they were better looking and tasting than any I had ever made! Of course they were… and then she went on to dress them up with butter-cream, sprinkles, oreos … ! She really did well on her first independent bake and frosting!
“Simplicity is the ultimate sophistication.”
Leonardo da Vinci
This is a simple cake and it’s been more than 2 years that I’ve had this recipe bookmarked. Its been on my folder of recipes I HAVE to try forever, yet I missed making it last winter {orange season here}. A few days ago an uncle dropped by to see me, and also dropped by huge bags of apples and oranges. It was time to bake! The apples found their way into these Apple Strawberry Basil Hand Pies. The oranges were destined for Anna Olsons Orange Almond Olive Oil Cake, a recipe I adapted from Vals post of April 2009. Visiting Vals blog is always nostalgic. More Than Burnt Toast and PAB go back many years. I’ve known Val ever since I began blogging {well almost, because in the first few months of blogging I was petrified of this whole blogging paraphernalia}.She’s a wonderful Canadian food blogger, supportive, fun and talented. We got to know each other better as time passed, and had a great time with the Blogger Aid Cookbook. I contributed a recipe to it, was part of the editing team, and thought up the idea for the book cover.The cake baked in the kitchen, filling the house with the most amazing aromas. I hadn’t felt this sweet bakery feeling in months. Summer has been filled with quick light desserts, baked in a hurry, sometimes no bake stuff. With the weather changing, a silent feeling of fall round the corner, this cake smelt so good, warm and comforting!
While the cake rose in the oven, I sliced up the oranges. The citrus salad is a refreshing, novel idea; a must make! All of it came together beautifully. My cake didn’t have as light a crumb as Vals because I used almost half almond meal and half all purpose flour. It was denser yet moist and delicious.
The citrus salad is a beautiful addition to an already delicious cake. I took it a teeny indulgent step further, and served some with a drizzle of low fat cream with the citrus salad topping it. YUM!! The kids enjoyed just plain chilled slices too, and we were sad that it got over too soon! What could be better!!Olive oil in baking is a wonderful idea and you must try and use a good quality brand. I would love to bake extensively with extra virgin olive oil but for its prohibitive cost. That said, this cake recipe will be made often as it was really nice!
“Doing what you love is the cornerstone of having abundance in your life.”
Wayne Dyer
July has been a LONG tiring month, with most of the family getting hit by viral fever. Our little new pooch added to the general madness & mayhem, yet the Daring Baker in me stood up and did a happy jig when I saw this months challenge – Fresh Frasiers.
Jana of Cherry Tea Cakes was our July Daring Bakers’ host and she challenges us to make Fresh Frasiers inspired by recipes written by Elisabeth M. Prueitt and Chad Robertson in the beautiful cookbook Tartine.
For the uninitiated {that includes me when I first read about the challenge}, it certainly wasn’t Frasier, the American sitcom, which was my first thought. A traditional Frasier is crème mousseline (pastry cream with extra butter) and strawberries sandwiched between two sheets of heavily imbibed sponge (genoise) cake, and it is topped with either a sheet of red or green almond paste or Italian meringue. I googled for some background and found a little information …
During the springtime, french pastry chefs make this cake to take advantage of the fresh strawberries (“fraises”) that are abundant during this season.
Charming indeed, like everything French! Mr PAB is in France {Toulouse} at the moment for an aircraft delivery and has me simmering with envy. He is absolutely enjoying the beautiful country, the food & wine, the culture etc, and mails me a few pictures everyday …. I couldn’t accompany him because of my little new pup!! She’s as cute as a button, full of beans and more naughtier than I could ever imagine. For the record, my herbs and other plants are history! She loves greens & looks at me with the whites of her eyes showing while chomping them, especially my oregano!!Back to business... Frisiers are said to be traditional French strawberry & cream dessert. In my case, I had to wander far from traditional as we are long past strawberry season here in India. Stone fruit are in season, and … … my best bet was mango since they have flooded the market unbelievably. As far as the eye can see, you find baskets and handcarts piled HIGH with this luscious fruit. I paired my frasier with a pistachio marzipan as almond paste isn’t available in India. Besides, pistachio pairs beautifully with mango. It is my favourite nut & offers great play of colour! {Not here eventually as humidity played spoilsport}July is my Dad’s birthday month, so the cake challenge was greeted with open arms. Maybe I got too enthusiastic because I was left doing it all from scratch. My trusted Thermomix {I love this kitchen machine} is my BFF! It blitzed the pistachios into marzipan without a whimper, and then faithfully plodded on to make the crème patisserie. Where can I have home made pastry creme turned out in 7 minutes without as much as a stir? I love it!!Also, I was extra ambitious and thought of doing a mango mirror. To cut a long story short, the weather was so hot and humid that the mirror eventually slid right off, melting bit by bit. Much to my horror, it took a chunk of the marzipan with it too. The cake was later covered with vanilla cream.I made a somewhat similar Mango Bavarian Cream Cake in July last year {pictured above}, and it held up beautifully. So much for my adventurous spirit this time. I salvaged whatever I could of the cake, stuck it right back into the fridge and cooled my heels. It was cut later that night and though it was delicious and light, I think it’ll give you less heartache if the weather is cooler. I intend to have another go at this beautiful cake {and technique once the weather cools down}.Thank you Jana for a refreshing summer challenge. Thank you as always Lisa of La Mia Cucina and Ivonne of Cream Puffs in Venice for hosting this fab kitchen!! Do stop by here to see the refreshing & pretty frasiers the other daring bakers have risen to this July!
[print_this]Recipe: NAME
Summary: These recipes have been adapted from the cook book Tartine by Elisabeth M Prueitt and Chad Robertson, the chefs and owners of Tartine, a beloved San Francisco bakery.
Prep Time: 4 hours Total Time: 4 hours
Preparation time: The traditional recipe can be made in stages. As a whole the recipe requires at least 4 hours of time, and 4 hours of refrigeration, BUT the cake, pastry cream and syrup can be made days ahead of assembly to help ease the time burden. Once these three are made, the cake will take about half an hour to assemble followed by 4 hours of refrigeration.
Line the bottom of an 8-inch (20 cm) spring form pan with parchment paper. Do not grease the sides of the pan.
In a large mixing bowl, stir together the flour and baking powder. Add in all but 3 tablespoons (45 ml.) of sugar, and all of the salt. Stir to combine.
In a small bowl combine the oil, egg yolks, water, vanilla and lemon zest. Whisk thoroughly.
Combine with the dry ingredients and mix thoroughly for about one minute, or until very smooth.
Put the egg whites into a stand mixer, and beat on medium speed using a whisk attachment on a medium speed, until frothy. Add cream of tartar and beat on a medium speed until the whites hold soft peaks. Slowly add the remaining sugar and beat on a medium-high speed until the whites hold firm and form shiny peaks.
Using a grease free rubber spatula, scoop about ⅓ of the whites into the yolk mixture and fold in gently. Gently fold in the remaining whites just until combined.
Pour the batter into the prepared pan. Bake for 45 to 55 minutes or until toothpick inserted into the center comes out clean.
Removed the cake from the oven and allow to cool in the pan on a wire rack.
To unmold, run a knife around the sides to loosen the cake from the pan and remove the spring form sides. Invert the cake and peel off the parchment paper. Refrigerate for up to four days.
Crème patisserie / Pastry Cream – Ingredients:
1 cup milk
1 vanilla bean, scraped
1/8 teaspoon salt
2 tablespoons cornstarch
1/4 cup sugar
1 large egg
2 tablespoons unsalted butter
1 1/2 tsp gelatin
1/2 tablespoon water
1 cup low fat cream
Method:
Pour the milk, vanilla, and salt into a heavy sauce pan. Place over medium-high heat and scald, bringing it to a near boiling point. Stir occasionally.
Meanwhile, in a stand mixer add the cornstarch and sugar. Whisk to combine. Add the eggs to the sugar and cornstarch and whisk until smooth.
When the milk is ready, gently and slowly while the stand mixer is whisking, pour the heated milk down the side of the bowl into the egg mixture.
Pour the mixture back into the warm pot and continue to cook over a medium heat until the custard is thick, just about to boil and coats the back of a spoon.
Remove from heat and pass through a fine mesh sieve into a large mixing bowl. Allow to cool for ten minutes stirring occasionally.
Thermomix:Place all ingredients in TM bowl. Cook at 100C/ Speed 5 / 7-8 minutes}. Transfer to a heat proof bowl, allow to cool for 10 minutes. Proceed.
Cut the butter into four pieces and whisk into the pastry cream a piece at a time until smooth. Cover the cream with plastic wrap, pressing the plastic wrap onto the top of the cream to prevent a skin from forming. Chill in the refrigerator for up to five days.
In a small dish, sprinkle the gelatin over the water and let stand for a few minutes to soften.
Put two inches (55 mm) of water into a small sauce pan and bring to a simmer over a medium heat.
Measure 1/4 cup of the chilled pastry cream into a small stainless steel bowl that will sit across the sauce pan with the simmering water, without touching the water.
Heat the cream until it is 120 F (48.8 C). Add the gelatin and whisk until smooth. Remove from the water bath, and whisk the remaining cold pastry cream in to incorporate in two batches.
In a stand mixer, fitted with the whisk attachment, whip the cream until it holds medium-stiff peaks. Immediately fold the whipped cream into the pastry cream with a rubber spatula.
Simple Syrup – Ingredients:
1/3 cup vanilla sugar
1/3 cup water
Method:
Combine the water and sugar in a medium saucepan.
Bring the mixture to a boil and let the sugar dissolve. Stirring is not necessary, but will not harm the syrup.
Remove the syrup from the heat and cool slightly. Transfer to a lidded container or jar that can be stored in the refrigerator. Simple syrup can be stored for up to one month.
Pistachio Marzipan – Ingredients:
Makes 142gms, enough for a 9″ disk
From Cake Bible by Rose Berenbaum
1/4 cup pistachios, roasted at 180C for 5-7 minutes
Scrape as much skin off the pistachios as possible. Process them in a food processor until a smooth paste is obtained. {Thermomix: Speed 10 /5-7 seconds. Repeat 2-3 times}.
Add sugar and process until well blended. {Thermomix: Speed 10 / 10 seconds. scrape the sides}
Add the corn syrup and glucerine and process for another 20 seconds, until well blended.{Thermomix: Speed 10 / 10 seconds. scrape the sides} The mixture will appear dry, but a small amount pressed between your fingers should hold together. If it seems too dry, add more corn syrup, 1/4 tsp at a time.
If you wish a deeper green, add a drop or 2 of green food colouring. Process until the marzipan has a smooth dough like consistency. Knead briefly until uniform in colour. You can use the marzipan at once, but its easier to work with if you rest it for an hour.
Mango Mirror – Ingredients:
2 medium ripe mango, coarsely chopped
70g sugar 100 ml water
2 Tbsp lime juice {you can use lemon juice}
2 Tbsp water, extra
1 1/4 tsp unflavored gelatin several drops of yellow food coloring
Method:
Place mango flesh, sugar, and 50 ml water in saucepan. Cook over low heat, crushing the flesh with back of a spoon to start juices flowing.
Simmer for 10 minutes. Pour through a colander and drain into a bowl. Do not press down the pulp too much or your mango mirror won’t be shiny because of the pulp.
Place lime juice and extra water in a small bowl. Sprinkle gelatin over this mixture; set aside until spongy.
Put the mango juice into a pan and bring to a simmer. Pour over the gelatin mixture and stir to dissolve. Tint to desired color with yellow food coloring. Place bowl over bowl of ice water and stir occasionally until the mixture is syrupy and just beings to thicken(do not let jell).
Fraisier Assembly:
Components:
1 baked 8 inch (20 cm) chiffon cake
1 recipe pastry cream filling
⅓ cup simple syrup or flavored
1kg mangoes, peeled, diced into 1/2″ pieces
1 recipe pistachio marzipan
Method:
Line the sides of a 10-inch (25 cm) spring form pan with plastic wrap. Do not line the bottom of the pan.
Cut the cake in half horizontally to form two layers.
Fit the bottom layer into the prepared spring form pan. Moisten the layer evenly with the simple syrup. When the cake has absorbed enough syrup to resemble a squishy sponge, you have enough.
Hull and slice in half enough strawberries to arrange around the sides of the cake pan. Place the cut side of the strawberry against the sides of the pan, point side up forming a ring.
Pipe cream in-between strawberries and a thin layer across the top of the cake.
Hull and quarter your remaining strawberries and place them in the middle of the cake. Cover the strawberries and entirely with the all but 1 tbsp. (15 ml) of the pastry cream.
Place the second cake layer on top and moisten with the simple syrup.
Lightly dust a work surface with confectioners’ sugar and roll out the almond paste to a 10-inch (25 cm) round 1/16 inch (1.5 mm) thick. Spread the remaining 1 tablespoon (15 ml) of pastry cream on the top of the cake and cover with the round of almond paste.
Cover with plastic wrap and refrigerate for at least 4 hours.
To serve release the sides of the spring form pan and peel away the plastic wrap.
Serve immediately or store in the refrigerator for up to 3 days.
Notes: The gelatin will continue to stiffen day by day. The longer you let your finished cake sit, the more firm it will become. Also, it’s worthwhile assembling the cake on the platter it will be displayed on. Plcae the bottom layer on the platter, then affix the dessert ring / cling wrap lined spring form pan around the bottom layer. It saves the hassle of trying to move the cake after assembly.
[/print_this]
“Food imaginatively and lovingly prepared, and eaten in good company, warms the being.”
Marjorie Kinnan Rawlings
{Warning: This is a LONG post. The recipe can be found at the bottom…}
Third time lucky? Yes indeed! We landed up in Sydney yet again, taking in the early morning fresh air and happy to be Down Under. It’s a vacation we look forward to and enjoy it in the truest sense of the word. A vacation here means friends, fun, food … This time our friend Ulyana was waiting with the B52 – her newest indulgence and obsession {in her words, Google it mate!!}! She’s a lively one, a Ukrainian to boot, talented beyond belief, jovial, full of life … and races through each week waiting for Friday! We’ve known her for over 20 years and she exudes enthusiasm in every breath! She loves baking and this time charmed us with an almond cake with no butter/fat added. How does one describe the lightest and sweetest cake ever, a cake disappeared really quick? There was something about it … the texture, the sweetness, the natural flavours of almond meal, gentle yet so addictive that is was difficult to stay away.Catch the recipe at the end of this post! And if you are wondering what the sketch in the collage below is about, it’s the church in Ukraine that Ulyana was christened in. It’s an oil she had on her wall that the daughter decided to replicate in charcoal while we were there, done in the midst of all the baking and merriment. She did a beautiful job of it, and her charcoal was eventually framed and stayed in Sydney, as a gift for our gracious host!Back to the cake … we left it sitting on the counter and drove downtown. No visit to Sydney is complete without a visit downtown, so we got to the city asap. The spectacular views of the Opera House knock you off your feet. We were still pretty jet lagged but one step on the Rocks and it was magic! A flood of memories came tumbling in … we’d been here before! Just dug out the kids pictures when we were there in 2004 … {in 2009 as well} Hungry the minute we reached, we headed for Circular Quay – food first. Must have been the best batter fried fish and chips we’ve had in ages. I think the fish was barramundi, a local fish – FAB! The lad was quite adventurous and went for a baby octopus salad as a side. Hats off to him for even trying it, though he looked definitely queasy after downing half of it! The kids had a blast with the gulls and then we were tempted to stop by the very inviting Sydney Guylian Belgian Chocolate Café … DROOL! What’s not to love about SO MUCH CHOCOLATE! Too full to eat any more, we had flat whites and lattes, while the kids dipped strawberries into decadent dark chocolate fondue. As the sun set, we soaked in the the different hues the iconic Opera House offered, walked around immersed in the beautiful views of the Harbour Bridge, the aborigines playing the didgeridoos, native music, the trapeze artists, watching in amazement at the Vivid Sydney Festival of lights … beautiful city this!{We were back soon to take a boat ride down to Manly for the Food & Wine Festival there. That’s another post, but I was sorry to have missed Shaz as I later realized she lives 4 beaches down from Manly. LOVED talking to her on the phone though … it was like we’d known each other for AGES. Yay for food bloggers and the connect!}Stopped for a delicious Thai dinner on the way home, and came back to the cake, ready and waiting. As we sat there polishing of the last crumbs of this fantastic cake, I’m glad I grabbed the camera just in time to get a few pictures of a cake that was gone in a matter of hours … We’re back home now, the pictures bringing alive memories of indulgent days spent eating and drinking … vintage cheese, bruschetta, grilled portabello mushrooms, Uzbekistani pulao, Thai Laska {which was a killer}, chilli con carne, meatballs with gravy, Teriyaki chicken, home made sushi … Tell tale signs of an indulgent holiday announced themselves and it’s time for a diet! The daughter kicked into her dieting diva mode immediately, so I have made Ulyanas almond cake twice already. {Minor changes – ground whole almonds with some sugar instead of almond meal and a sprinkling of slivered almonds on top.}
[print_this]Recipe: Almond Cake
Summary: A delicious to the last crumb almond cake … moist and addictive, yet with no added fat.
Prep Time: 25 minutes Total Time: 75 minutes Ingredients:
5 eggs, separated
200gms sugar
1 tbsp cornflour
225gms almond meal
1 tbsp brandy
1 tsp almond extract
1 tsp baking powder
Method:
Preheat oven to 170C. Grease and line a 7″ round tin.
Beat yolks with half the sugar until light and fluffy. {In stand mixer for 10-15 minutes}. Mix brandy and almond extract in a small bowl, and drizzle in bit by bit while the yolks are mixing.
Add cornflour, continue beating, followed by baking powder and a pinch of salt.
Add the almond meal, and continue to mix. The batter will get firmer and firmer.
Beat the whites separately with the remaining sugar, and add by the spoonful to the dough like batter with the machine running.
Bake for about an hour. Take out of oven, remove the sides and leave on rack for 10 minutes. Carefully remove bottom, and allow to cool completely.
Sift over with icing sugar if desired, slice and serve.